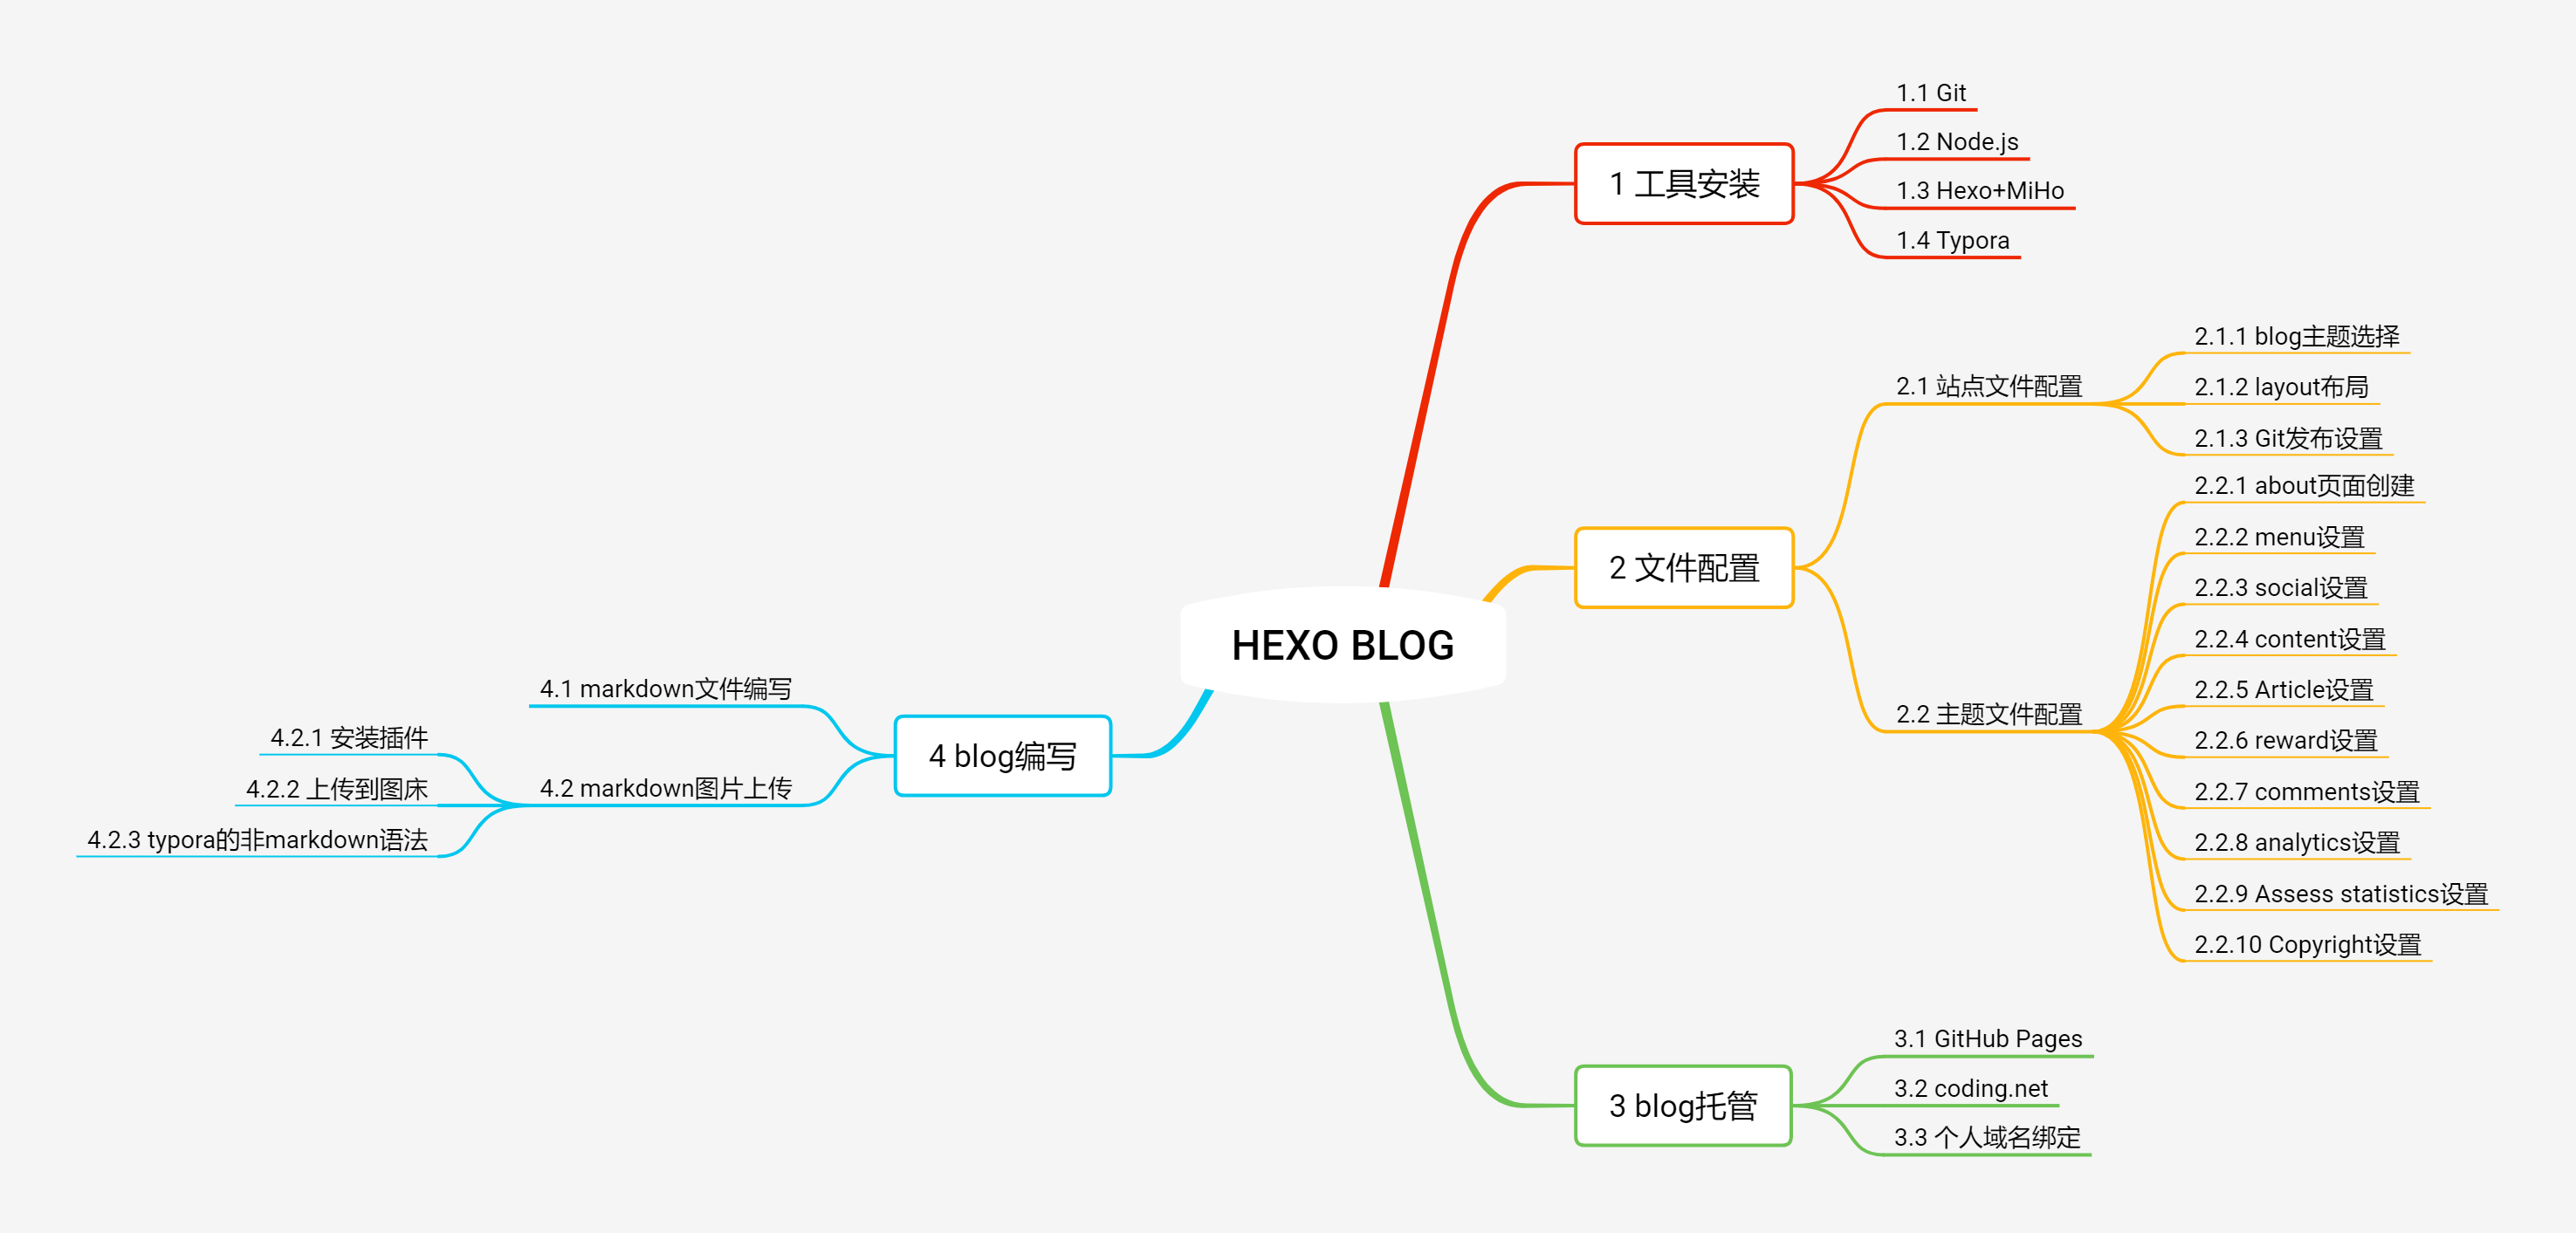
# URL # 这项暂时不需要配置,绑定域名后,要创建 sitemap.xml 时再配置该项 ## If your site is put in a subdirectory, set url as 'http://yoursite.com/child' and root as '/child/' url:https://allbluelai.github.io# 修改为个人的GitHub Pages地址 root:/ permalink::year/:month/:day/:title/ permalink_defaults:
# Writing # 文章布局、写作格式的定义,不修改 new_post_name::title.md# File name of new posts default_layout:post titlecase:false# Transform title into titlecase external_link:true# Open external links in new tab filename_case:0 render_drafts:false post_asset_folder:true relative_link:false future:true highlight: enable:true line_number:true auto_detect:true tab_replace: # Home page setting # path: Root path for your blogs index page. (default = '') # per_page: Posts displayed per page. (0 = disable pagination) # order_by: Posts order. (Order by date descending by default) index_generator: path:'' per_page:10 order_by:-date # Category & Tag default_category:uncategorized category_map: tag_map:
# Date / Time format # 日期 / 时间 格式,不要修改 ## Hexo uses Moment.js to parse and display date ## You can customize the date format as defined in ## http://momentjs.com/docs/#/displaying/format/ date_format:YYYY-MM-DD time_format:HH:mm:ss
# Pagination # 每页显示文章数,可以自定义 ## Set per_page to 0 to disable pagination per_page:10 pagination_dir:page
# Favicon of your site | 网站icon favicon:/favicon.ico
# Header
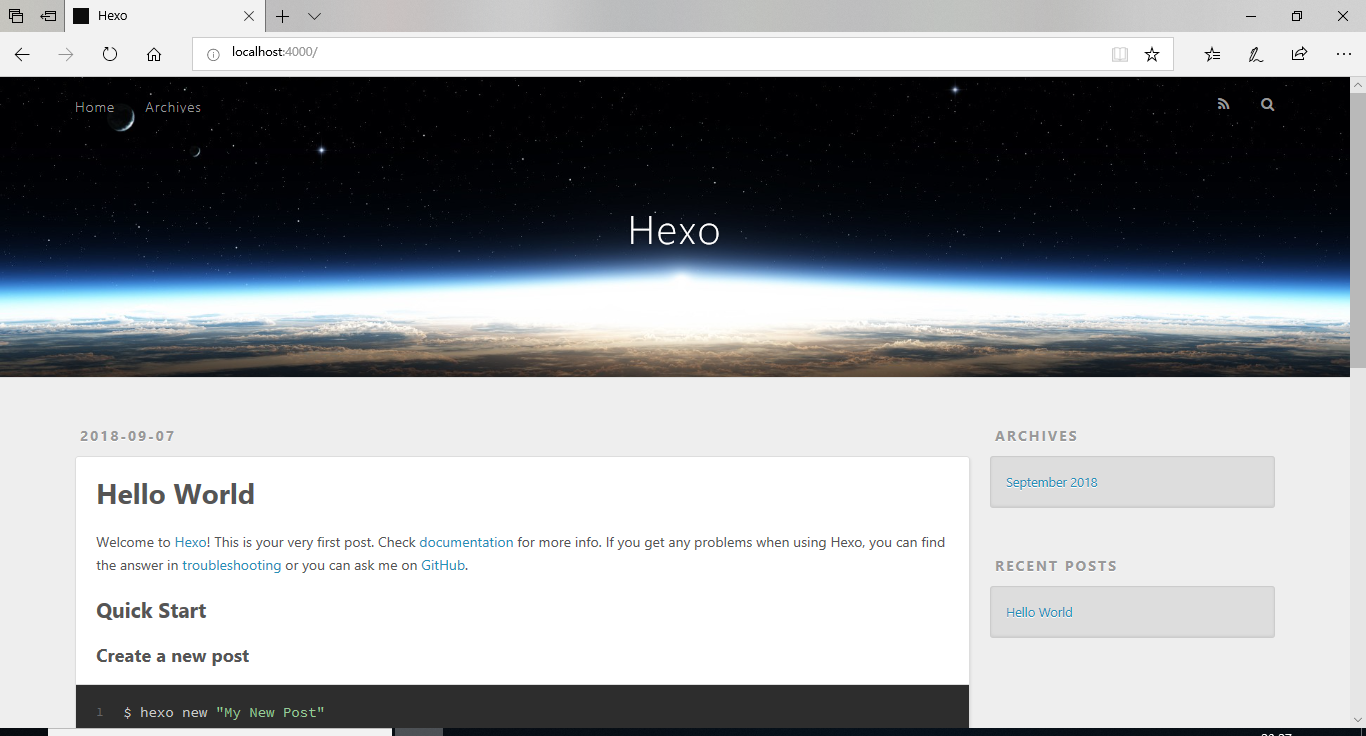
# Keywords of your site | 网站关键字 keywords:MyHexoBlog # Head headline | 头部标题 header_title:haffner2010'sBlog # Head description | 头部描述 header_description:ABoyfromSCNU # Link to your logo | logo地址 logo:images/logo.png # Link to your banner_img | 首页banner图地址 banner_img:images/banner.jpg # Menu setting | 菜单设置 # name: Font Awesome icon | Font Awesome 图标 # title: Home Title | 标题 # url: //minhow.com Url, absolute or relative path | 链接,绝对或相对路径 # target: true Whether to jump out | 是否跳出 menu: home: title:Home url:/ target:false archive: title:Archives url:/archives target:false user: title:About url:/about target:false # Social setting, use to display social information | 社交设置,用来展示社交信息 # name: Font Awesome icon | Font Awesome 图标 # title: Home Icon title | 图标标题 # url: //minhow.com Url, absolute or relative path | 链接,绝对或相对路径 # target: true Whether to jump out | 是否跳出 social: home: title:haffner2010 url://allbluelai.github.io target:true github: title:Github url://github.com/allbluelai target:true book: title:Jianshu url:https://www.jianshu.com/u/e031670b216b target:true envelope-o: title:Email url:mailto://myprojtest@163.com target:true #weibo: # title: Weibo # url: # target: true #twitter: # title: Twitter # url: //twitter.com/huangminhow # target: true #qq: #weixin: #snapchat: #telegram: #envelope-o: #facebook: #google: #linkedin:
# Content
# Excerpt length | 摘录长度 excerpt_length:190 # Excerpt link | 摘录链接 excerpt_link:more>> # New window open link | 新窗口打开文章 open_new_link:true # Article default cover picture,size:350*150 | 文章默认封面图,尺寸:350*150 cover_picture:images/banner.jpg # Open background particles | 开启背景粒子 open_bg_particle:true # Open animation in homepage and head | 开启主页及头部动画 open_animation:true
# Article
# Open toc | 是否开启toc toc:true # Open share | 是否开启分享 share:true
# Style customization | 样式定制 style: # Main color tone | 主色调 main_color:'#0cc'